
How to Fix Air Mattress Bubble (5 Simple Steps)
Disclosure: We may get commissions for purchases made through links in this post.
For days (or even weeks), you’ve been struggling to sleep because of the ‘bumps’ on your air mattress. Commonly called air mattress bubbles, these air mattress bulges and lumps have been pulling you away from dreamland. Consequently, each troubled sleep pushes you to contemplate simply buying a new air mattress (view on Amazon).
There are 5 easy-to-follow steps on how to fix an air mattress bubble. From preparing your bed for the simple fix to nurturing it back to life (minus the bubble), you should have a comfortable place to sleep once again.
First, take everything off your mattress, including the sheets and pillows. Next, release some air. Check for lumps that you may have missed and do not deflate entirely. Gently apply pressure to remove the bubbles, re-inflate, and then seal.
Here’s a quick list of how to fix an air mattress bubble:
- Undo your bed
- Release some air
- Apply pressure
- Pump air back
- Seal
The steps are as easy as they read. What’s more, you’ll get quick solutions for other air mattress problems that have been keeping you up at night. This article would also give you a peek into the why’s of air mattress bubbles and troubles. Are you ready to become an air mattress expert?
How to Fix Air Mattress Bubble
As easy as 123 or ABC, here’s what you need to do if your air bed has a lump.
1. Undo Your Bed
This step means emptying everything that’s on your bed. Remove the sheets, comforters, pillows, and blankets (view on Amazon). If you’re using a mattress pad, take that off as well. The rationale behind this is simple – it’s easier to locate the bubble – or bubbles – when there are no obstructing materials.
Even if your air mattress only has a bulge in the middle, or the bubble is big enough to go unnoticed, it pays to look for smaller bubbles as well. Unless there aren’t any, broken or overly stretched seams are the first areas that you should inspect closer.
Not all air mattresses have quality seams. Some lesser quality air mattress seams could pop easily, creating small bubbles that are hardly noticeable unless you look closer.
If you inflate your air mattress using an electric pump, make sure to unplug it from the electric outlet before continuing to the next step.
2. Release Some Air
Word of caution: Never try to fix an air mattress bubble while your bed is fully inflated. All that built-up air would turn a likewise easy fix into a tedious process. Gradually releasing air from your air mattress also allows you to scout your bed’s entire surface for irregular bumps and lumps.
If you’re using a built-in pump, pressing the deflate button makes the deflation a breeze. Deflating your air mattress using a stand-alone pump (view in Amazon) is just as easy. Just open the nozzle and slowly release the air. You could also try rolling up your air mattress to help you force the air out. If possible, ask someone’s help if you choose to do this.
Another crucial reminder – don’t deflate completely. You need sufficient air inside your air mattress to start fixing the bubbles. The next step explains why.
3. Apply Pressure
With your hand, apply pressure on the air mattress bubble (if there are several, do the biggest one first) while you’re releasing air. Remember to only apply light pressure so you’d avoid tearing the material. Air mattress bubbles could cause you discomfort but making your air mattress unusable is not an option.
The merit of this step is that on most occasions, you’ll be able to pop away and fix your air mattress bubble at this stage. The pressure you apply moves the air build-up from the air mattress out the inflation tube.
As soon as the air mattress bubble disappears or becomes less protruding, that’s your signal to stop deflating.
Repeat this process if you have to fix more than one air mattress bubble. Having someone to help you could also minimize you having to hurry back and forth between the bubble and the air release nozzle in case the two are distant from each other.
4. Pump Air Back
After popping out the air mattress bulge in the middle or other areas of your bed, you’re ready to re-inflate.
Whether you’re using an electrically inflated air mattress or not, or your air mattress comes with an internal or external pump, avoid over-inflating, possibly introducing yet another air mattress dilemma (bonus material below).
Gently place your palm on the air mattress and test for firmness or softness that suits you. You can also check if your air bed still has a lump. If so, simply repeat steps 2 and 3.
5. Seal
Sealing off your air mattress might seem quite obvious that it doesn’t need to be among the steps. But it could be something that slips your mind after fixing your air mattress bubble. Seal it by quickly reattaching your air mattress’ nozzle cap, allowing very little air to escape after you’ve achieved your desired firmness or softness. Check the inflation tube cap’s integrity as well. You may have fixed your air mattress bubble, only to feel like lying on a sinking ship as your bed gradually deflates.
2 Quick Fixes
The most common cause of air mattress bubbles is overinflation. If this is the reason for your air mattress bulges, you have two quick options:
- Release Extra Air: Without undoing your bed, simply release the excess air from your air mattress.
- Deflate Completely: Here’s the beauty of complete deflation. If overinflation stretched the material of your air mattress, the absence of air inside the bed allows the material to ‘shrink back’ to its comfortable state. Next, gradually pump air in, ensuring not to overinflate this time. You need to remove everything on your bed, though, should you choose to do this fix.
Prolong the Life of Your Air Mattress
Finally, you’ve successfully popped out all those pesky air mattress bulges in the middle of your bed. But what if your Intex air mattress (view on Amazon) bulges on one side? How about when your air mattress’ seams popped and started leaking air?
Together with the ‘culprits’ of such problems, we listed preventive measures to prolong the life of your air mattress. We also compiled other issues faced by air mattress owners with corresponding quick solutions.
Causes of Air Mattress Bubbles and Other Problems
- Uneven weight distribution: Sleeping on the same spot every night turns the bed material of that space more susceptible to wear and tear like air leaks. Constant pressure on either side of the bed also makes the air mattress center appear bulged. Your body also creates a pressure point, pushing air from one area to another and creating bulges.
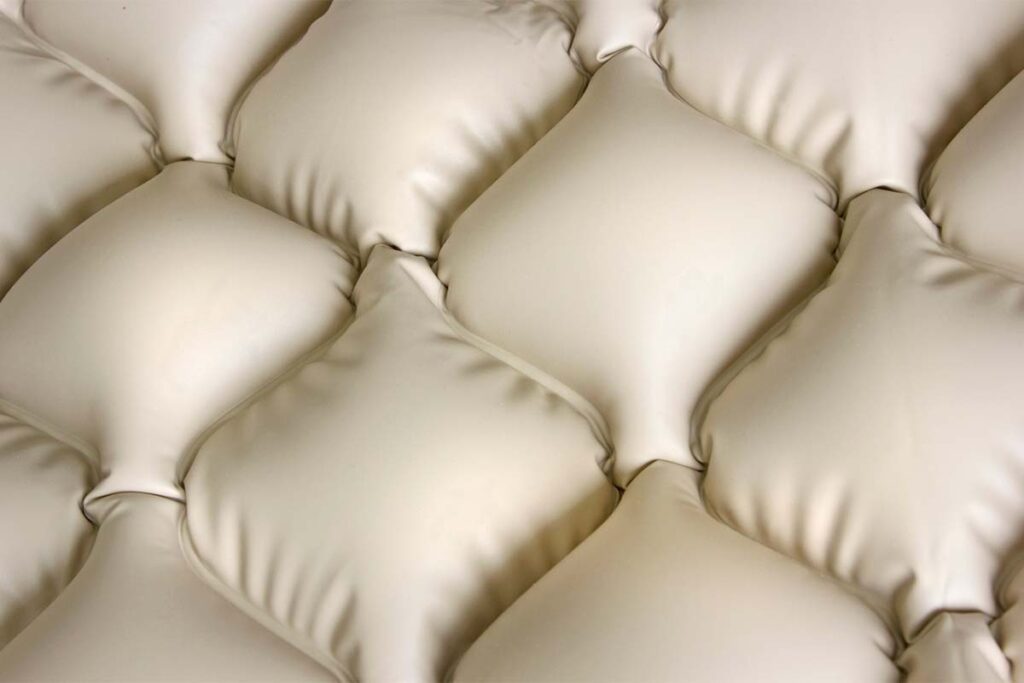
- Air mattress seam popped: The diamond-shaped structure in air mattresses is to prevent them from blowing up like a balloon. When one or two seams rupture, mini balloons or bulges appear.
- Factory defects: These aren’t always visible upon purchase, especially if you’re given a still-boxed product. This is often the case because you’d rather get one that isn’t on display.
- Age: Normal wear and tear could result in varied air mattress problems.
Prolong Your Air Mattress’ Life
- Don’t overinflate: Overinflation could break the seams in your air mattress, leading to bulges over the broken seams. Air leak is another issue that you may have to face in the future.
- Flip your air mattress once a month: Flipping your air mattress regularly prevents your body from ‘imprinting’ on the same spot every time you sleep.
- Regularly check the inflation tube cap: You could be pumping your air mattress with air to a plump and stretching the material, thinking that you just couldn’t find a leak. A cap not tightened enough or a chipped one could be causing an unnecessary air leak.
- Follow product instructions: Pay particular attention to your air mattress’ weight capacity.
- Check your pockets and clothing: Items with ragged edges like keys, metal buttons, and belt buckles could accidentally puncture your air mattress.
Air Mattress Issues and Quick Solutions
- Air mattress bulge on one side: If you prefer to sleep either on the left or right side of the bed, rotate your air mattress between uses to distribute your weight.
- Leak: Whether it’s because of a hole or a broken seam, sand off about half an inch around the leak. Make a patch out of an old shower curtain (or any material of the same thickness), then glue (view in Amazon) it over the leak. Press gently, covering the whole patch to secure it.
Conclusion – How to Fix Air Mattress Bubble
Let’s recap the 5 straightforward steps on how to fix an air mattress bubble:
- Undo your bed
- Release some air
- Apply pressure
- Pump air back
- Seal
On top of these, you also know how to quickly resolve the other issues you may have had with your air mattress. And in case you’re yet to face such challenges, you’re now confident that you’re ready for them.
Even if it’s finally time to say goodbye to your old air mattress, knowing about the causes of air mattress bubbles and how to prevent them would secure your future days in deep and comfortable slumber.
References:
- https://www.hunker.com/12568667/how-to-remove-air-bubbles-in-an-air-bed
- https://airbedcomparisons.com/air-mattress-develop-bubbles/
- https://www.hunker.com/13419868/my-air-mattress-has-a-big-bubble-in-the-middle
- https://www.doityourself.com/stry/how-to-fix-a-bubble-in-an-air-mattress
- https://krostrade.com/blog/why-does-my-air-mattress-have-a-bubble/
- https://thetopmattress.com/air-mattress-bubble/